
by Russ Mehling, General Manager, Webber’s Lodges
5 tips for setting up photos you can be proud of!
Nothing brings back memories of a great adventure like quality photos of game taken on a special hunt.
Many hunters are travelling greater distances than ever before, and with so many opportunities out there, time dictates many adventures will be of the once-in-a- lifetime variety.
Taking all kinds of photos is important, but for this post, we’re going to concentrate on the culmination of the hunt – the trophy photo. Since there are so many factors to keep in mind for these shots, we’ve broken it down into two parts: Setup and Photo Shoot.
Here is Part 1, with five important tips that will help make your memories a pleasure to revisit going forward.

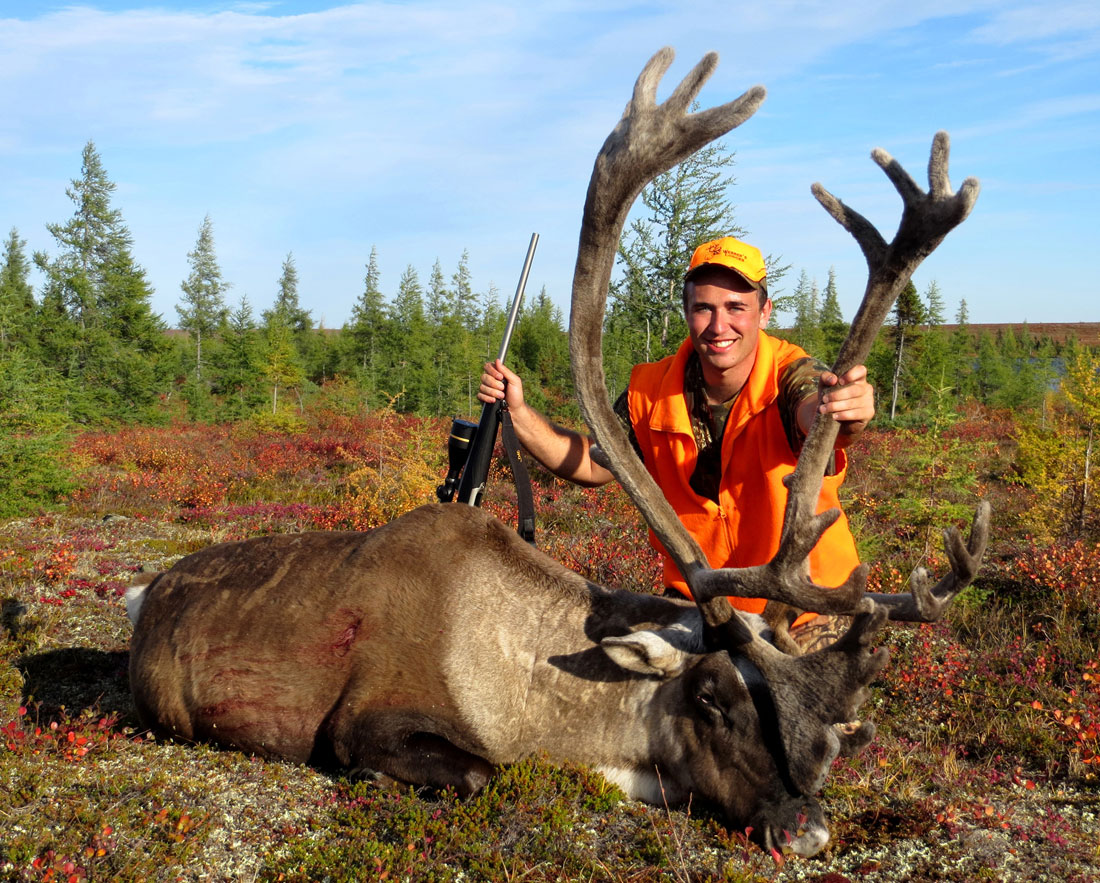
Sometimes adding a good looking guide improves the quality of your photo 🙂
1. Practise with your camera and know it’s settings
This is something you should do well before your trip, preferably from the moment you purchase your camera. Even if you plan on using your phone, you should get into picture mode and learn what you can and cannot do to take the best quality photos. Learn the focussing features, flash settings, and most importantly, how to hold the camera.
I remember growing up and picking up developed photos with extreme anticipation, only to find a pile of photos with blurry fingers and thumbs taking up corners and sometimes the entire frame. Most phones have the lens on an outside corner and it takes practice taking photos that don’t include close up pics of the photographer’s digits.
Other features such as timers, exposure settings and zooms should also be looked into, so that when the moment arises, you’ll know exactly what you need to do to get your camera to take the quality of photos everyone can be proud of.
If you decide to use only the camera on your phone, make sure you have it set to take the highest resolution possible. This will take up more memory, so make sure you clear out unnecessary photos prior to your trip. You’ll be glad you did if you ever decide to enlarge that picture of your amazing animal from your epic adventure!

Sometimes all you have to do is smile.
2. Prepare the animal and surrounding area
We’ve all seen the pictures where part of the animal is obscured by long grass, or the animal and area look more like a crime scene from Law & Order. We need to keep in mind that it will not only be hunters looking at these photos – especially with the increased popularity of social media sites. Prepping the animal and site could make the difference between proudly displaying the fact that you’re a hunter to the general public, or having your photo used to enforce some very negative stereotypes regarding hunters.
Photos you intend to share with a general audience (not just between close hunting buddies) don’t need to prove how the animal died, or how great a shot you made. We can assume the animal lying there is proof enough of your marksmanship. Many times it may be necessary (if possible) to slightly relocate the animal to a cleaner background.
Cleaning up the animal is also important. Baby wipes should be in every hunter’s pack — for obvious reasons that don’t need to be discussed here — plus they are excellent for cleaning up wounds and facial areas. While working in and around the head of the animal, make sure to wipe down the antlers/horns if necessary. If blood is continuing to flow from the nostrils, push a wipe or two up the nasal cavity. Of course, this would also be the time to remove the tongue if necessary.
Also remember that you will be in the photo too, so wiping those hands and making sure to remove blood-stained clothing is a good idea. If you can’t remove them without making the photo X-rated, make sure to pose yourself to hide the staining as best you can.
3. Posing the animal, setting the scene
Once the area is prepped, I like to pose the animal in as natural a state as possible. I realize dead is not a natural state, but what I mean is not in the back of a pickup, hanging from a gambrel, or splayed out on its back with four feet in the air.
Most hunters prefer a relaxed bedded pose, with the animal up on its brisket, and the hunter holding the head up in a natural position — not twisting or lifting it at severe angles. Obviously, the size of the animal will dictate how much posing/repositioning is possible, but it’s amazing what a little bit of extra effort will accomplish. Also, try a few different positions. We are past the days of burning up film and spending money on developing wasted photos, so try a few poses. With enough practice, you’ll know the poses that will work best to show off specific features of different animals.
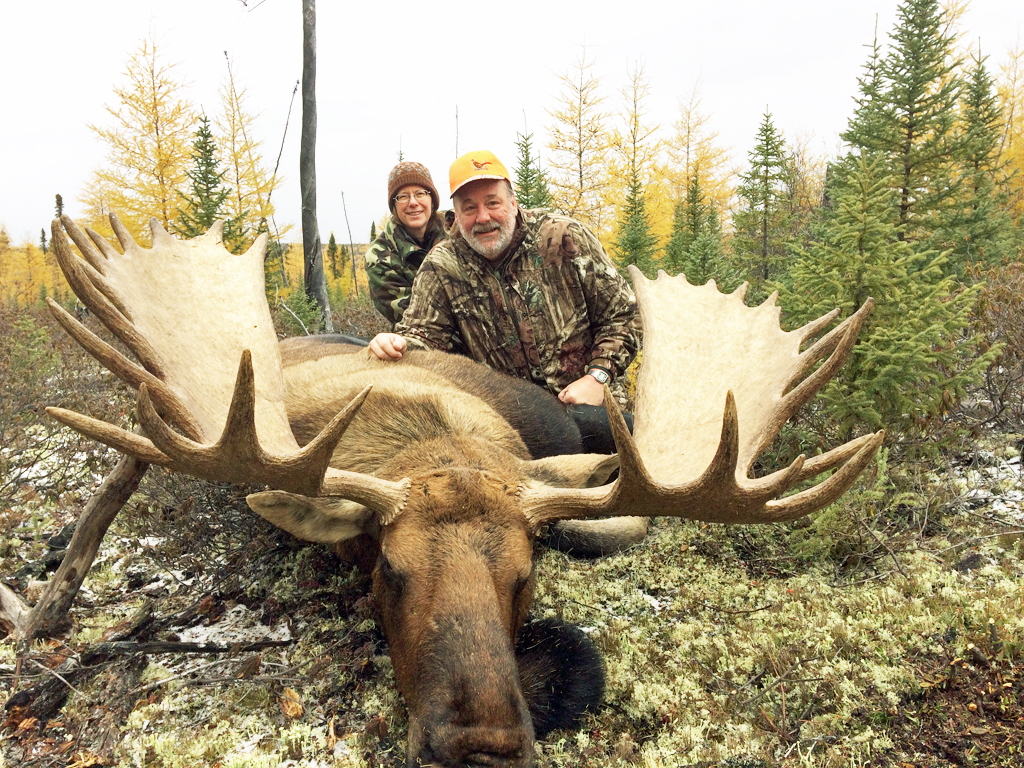
This is a good time to decide what and who you want in the photo. Of course, as the hunter, you will be in most of the shots, but you may also consider the guide, if one was involved. You may also have a close hunting partner, or even dogs, if they were used on the hunt, such as retrievers on a waterfowl trip.

The camaraderie on your hunt. Something you’ll always remember.
Some hunters also want to include their weapons. Was it taken with a bow, or a family heirloom rifle? In regards to firearms, if you intend to include them in some of your photos, please reflect safe firearm practises in all pictures. No pointing the barrel in unsafe directions and I always recommend having the action open for trophy shots.
4. The Sun
The sun will have a huge influence on the effort it takes to get high quality photos. Sunsets, sunrises, and overcast days will always present the best time to take photos with the least amount of effort. If temperatures and locations allow, always wait for these conditions to take your photos. If this is not possible and you have to work with the sun, make sure the sun is behind the photographer. And make sure you look out for hotspots caused by the sun breaking through in a semi-shaded, forested area. Try to keep the lighting as consistent as possible.
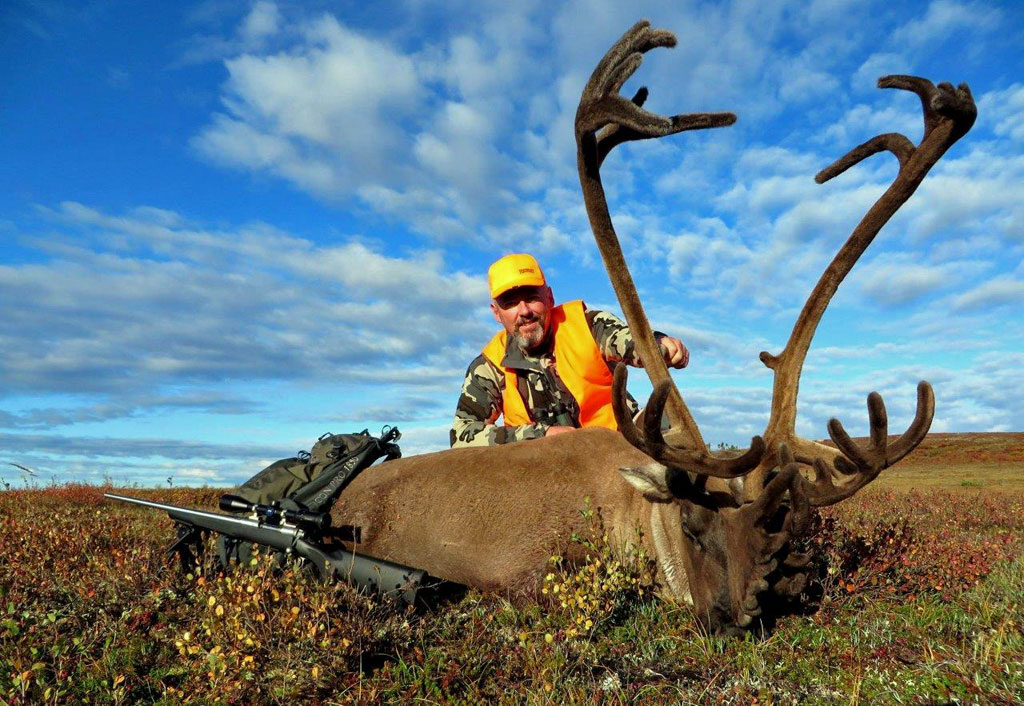
Look at that beautiful blue sky background!
5. Time
We kept the simplest for last. Taking your time is the most important thing you can do in this process. You’ve spent hours, even days, in a treestand. You’ve travelled hours in airplanes. You’ve waited months for the hunt to take place. After all those hours, days and even months invested, taking a few more minutes to set up and take quality photos will provide you with proud memories to share for years to come.
All of the tips mentioned above will only cost you minutes. That’s a small price to pay for the huge dividends you’ll receive in future when sharing these photos with friends, family, or even the cyber world!
Check in next month for Part 2 of How to Take Trophy Wild Game Photos!


Leave A Comment